
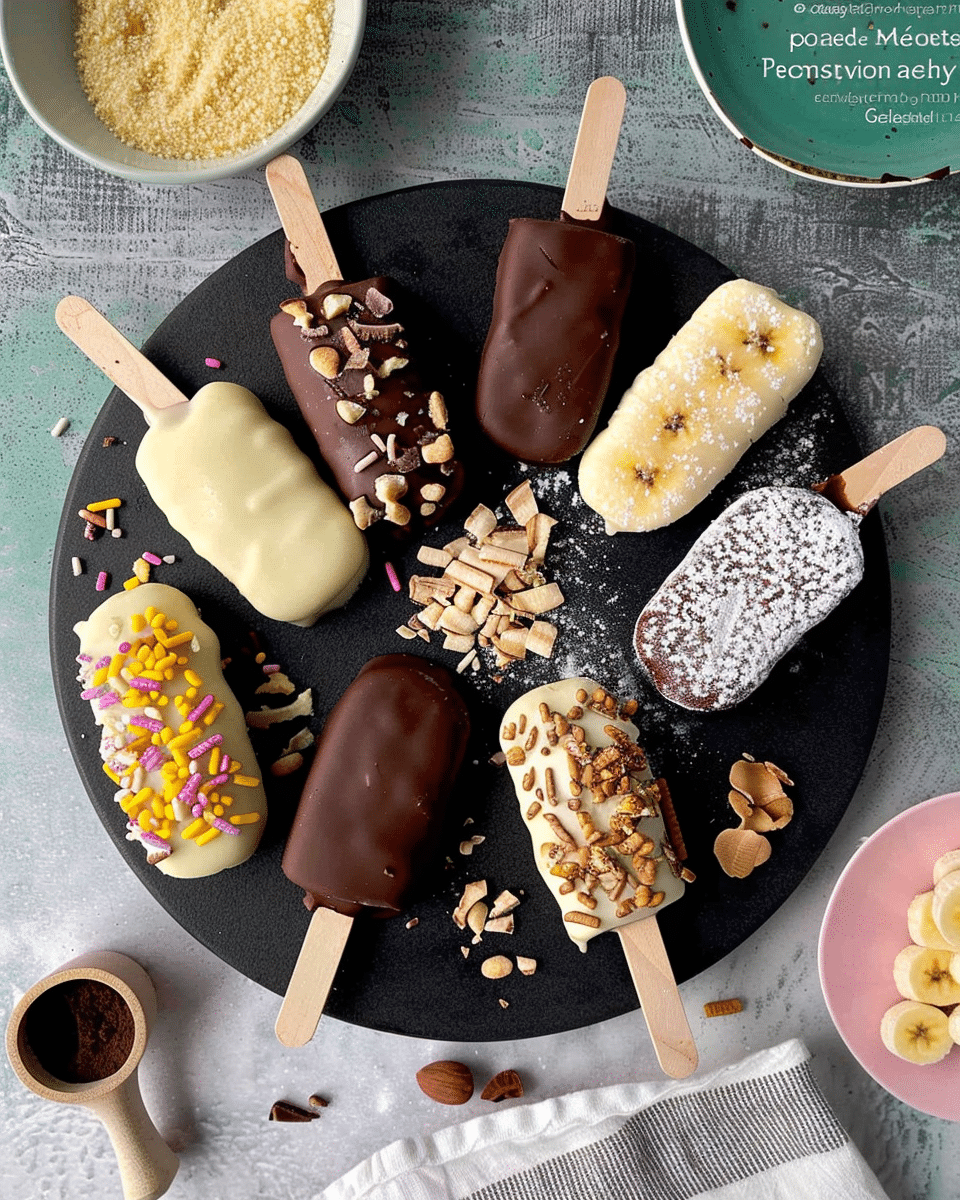
These chocolate covered banana pops are the kind of frozen treat I reach for when I want something sweet, simple, and satisfying. Made with just a few ingredients and customizable with endless toppings, these banana popsicles are a go-to dessert for both kids and adults. I love how they bring a nostalgic popsicle vibe while being made from wholesome, real ingredients. Perfect for hot summer days, though I honestly enjoy them year-round.

Why You’ll Love This Recipe
I like how incredibly easy these banana pops are to make. I just slice up some bananas, freeze them, coat them in melted chocolate, and sprinkle on whatever toppings I’m craving.
They’re freezer-friendly, which means I can make a batch ahead of time and enjoy them all week long without any prep.
The best part is how customizable they are. Whether I want something nutty, salty, fruity, or crunchy—there’s always a topping combo that keeps things interesting. And they make a fun cooking activity with kids, too!
Ingredients
(Here’s a tip: Check out the full list of ingredients and measurements in the recipe card below.)
-
ripe bananas – I pick bananas that are spotty but still firm. They give the perfect sweetness without becoming too icy when frozen.
-
chocolate chips or chopped chocolate – I usually go with dark chocolate for myself, but semi-sweet is great when I’m making them for others.
-
coconut oil – I stir this into the chocolate while melting to keep it smooth, glossy, and easy to spoon over the bananas.
-
optional toppings – I like to switch it up with chopped peanuts, shredded coconut, sprinkles, cacao nibs, caramel, peanut butter, or even flaky salt. Smaller toppings are easier to eat, but anything goes!
Directions
-
I start by lining a baking sheet with parchment paper.
-
I peel the bananas and slice them in half crosswise. Then I insert a popsicle stick into the cut side of each half.
-
I lay the banana halves on the baking sheet and freeze them uncovered for at least one hour.
-
While they’re freezing, I set up my toppings in small bowls so they’re ready to go.
-
In a microwave-safe bowl, I add chocolate chips and coconut oil, then microwave in 20-second bursts, stirring between each, until smooth.
-
Once the bananas are frozen solid, I spoon the melted chocolate over each banana pop while holding it above the bowl, letting any excess drip off.
-
Immediately, I sprinkle or dip each pop into toppings, lightly pressing to help them stick.
-
I place them back on the parchment-lined tray and freeze for another hour before serving. Any leftovers go into a freezer-safe bag for later.
Servings and Timing
This recipe makes 12 banana pops, which is perfect for a small gathering or a week of treats. The total time is about 2 hours and 10 minutes, including freezing time. Prep time only takes around 10 minutes.
Variations
I like to play around with different types of chocolate—white chocolate, milk chocolate, or even peanut butter chips. Sometimes I’ll drizzle a second chocolate layer on top for extra flair. For a salty-sweet twist, I’ll add pretzel crumbs or a sprinkle of flaky sea salt. When I want a fruity version, freeze-dried raspberries or strawberries add a nice tang.
Storage/Reheating
I keep these banana pops in a freezer-safe bag or container for up to one week. While they technically last up to two weeks, I find the texture starts to change and they may brown slightly. No reheating needed—just grab one straight from the freezer and enjoy.

FAQs
How do I keep the bananas from slipping off the stick?
I make sure to freeze them on the sticks first. This helps them stay in place when I’m coating them with chocolate and toppings.
Can I use white chocolate instead of regular chocolate?
Yes, I often switch things up with white chocolate or even do a two-tone drizzle. It’s a fun way to mix up the flavors and presentation.
What’s the best way to apply toppings?
I always add toppings right after spooning on the chocolate—while it’s still wet. Waiting too long means the chocolate hardens and nothing sticks.
Can I make these ahead of time for a party?
Absolutely. I make them the day before and keep them in the freezer until serving time. Just make sure they’re stored in a single layer to avoid sticking.
Are they safe for toddlers?
Yes, just be mindful of the toppings. I stick with softer or smaller options like sprinkles or crushed cereal for younger kids.
Conclusion
Chocolate covered banana pops are a simple, healthy-ish dessert that I never get tired of. Whether I’m making them for a weekend treat or prepping ahead for the week, they always hit the spot. With just a few ingredients and endless ways to customize, they’ve become a staple in my freezer—and I think they’ll become one in yours too.
Print
Chocolate Covered Banana Pops
Chocolate Covered Banana Pops are a fun and wholesome frozen treat made with ripe bananas, smooth melted chocolate, and customizable toppings. Perfect for kids and adults alike, they’re easy to make and ideal for hot days or anytime sweet cravings hit.
- Total Time: 2 hours 10 minutes
- Yield: 12 banana pops
Ingredients
- 6 ripe bananas, halved crosswise
- 1 1/2 cups chocolate chips or chopped chocolate (dark, semi-sweet, or milk)
- 2 tablespoons coconut oil
- Popsicle sticks
- Optional toppings: chopped peanuts, shredded coconut, sprinkles, cacao nibs, crushed pretzels, flaky salt, freeze-dried berries
Instructions
- Line a baking sheet with parchment paper.
- Peel bananas and cut each in half. Insert a popsicle stick into the cut side of each banana half.
- Place on the baking sheet and freeze uncovered for at least 1 hour until firm.
- Prepare toppings in small bowls while bananas freeze.
- Melt chocolate and coconut oil together in a microwave-safe bowl using 20-second bursts, stirring in between until smooth.
- Hold each frozen banana pop over the bowl and spoon melted chocolate over it, letting excess drip off.
- Immediately sprinkle or dip into toppings, gently pressing to help them adhere.
- Place finished pops back on the parchment-lined tray and freeze for another hour until chocolate is set.
- Store any leftovers in a freezer-safe bag or container for up to 1 week.
Notes
- Use spotty but firm bananas for best flavor and texture.
- Work quickly when coating and topping before chocolate hardens.
- Experiment with different types of chocolate and toppings for variety.
- Freeze banana pops in a single layer to prevent sticking.
- Let kids help decorate for a fun, interactive dessert activity.
- Prep Time: 10 minutes
- Cook Time: 0 minutes
- Category: Dessert
- Method: No-Bake
- Cuisine: American
- Diet: Vegetarian
Nutrition
- Serving Size: 1 banana pop
- Calories: 160
- Sugar: 14g
- Sodium: 5mg
- Fat: 9g
- Saturated Fat: 6g
- Unsaturated Fat: 2g
- Trans Fat: 0g
- Carbohydrates: 20g
- Fiber: 2g
- Protein: 1g
- Cholesterol: 0mg


