Dried Sliced Oranges are a simple yet stunning way to add natural beauty to your home, desserts, and drinks. Whether you’re decorating for the winter season, assembling thoughtful handmade gifts, or elevating a festive beverage, these vibrant citrus slices deliver both charm and versatility. With just one ingredient and a bit of patience, you’ll have a batch that lasts all season long.
Why You’ll Love This Recipe
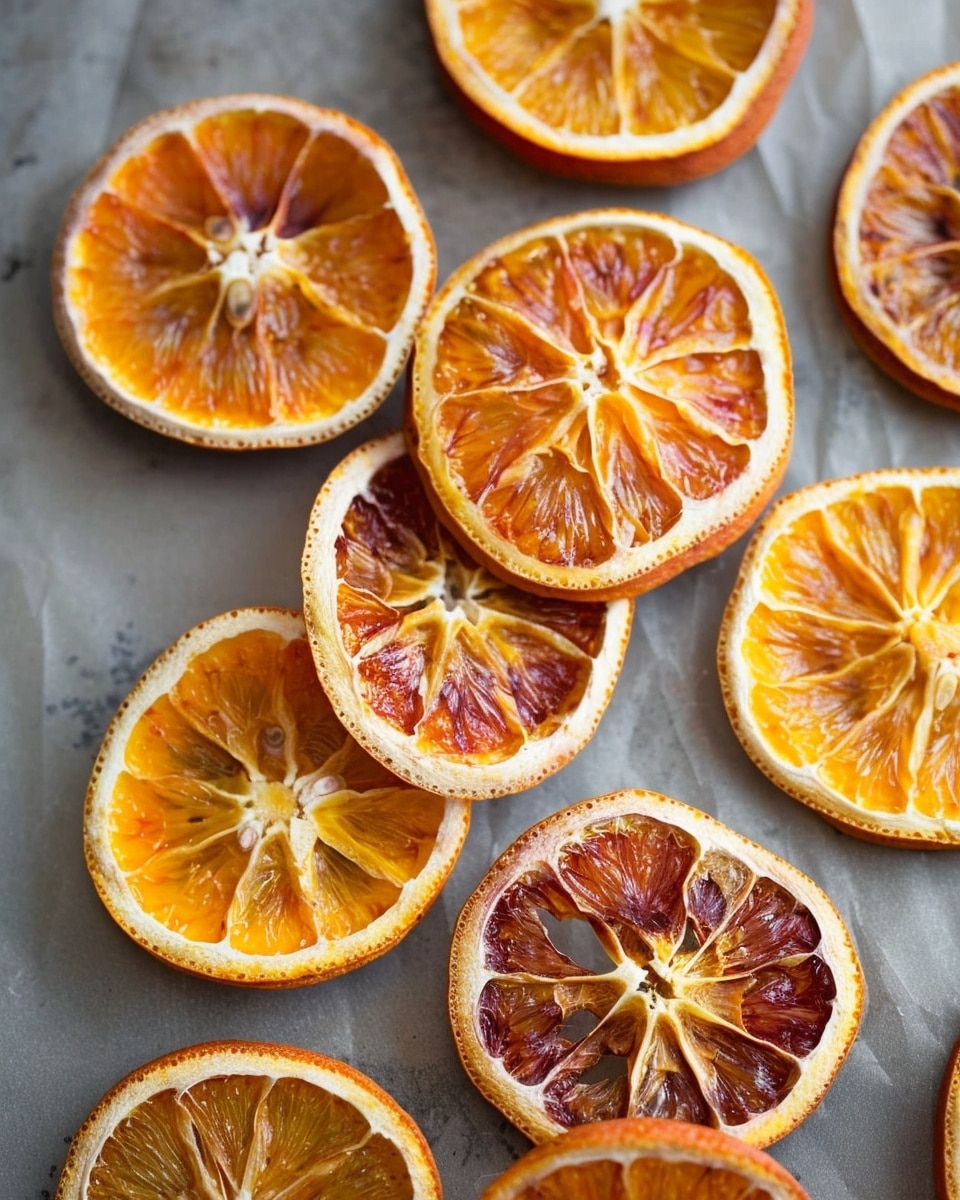
These dried orange slices are incredibly easy to prepare and require only one ingredient. They’re perfect for decorating garlands, wreaths, wrapped gifts, dessert platters, and drink stations.
You can make them in the oven or a dehydrator, depending on what you have available. They store beautifully for months, making them ideal for preparing ahead of the busy holiday season.
They are also edible, naturally sweet, and lightly chewy or crisp depending on how long they are dried. Their vibrant color adds warmth and elegance wherever they’re used.
Ingredients
(Tip: You’ll find the full list of ingredients and measurements in the recipe card below.)
4 medium oranges (approximately 2 to 2.5 pounds total)
Directions
Thoroughly wash and scrub the oranges under running water since the peel will remain on and is edible.
Using a mandoline slicer or a very sharp knife, slice the oranges into even rounds about 4 to 5 mm thick (approximately 1/8 to 3/16 inch). Uniform slices ensure even drying.
Lay the slices in a single layer on paper towels. Place another layer of paper towels on top and gently press to remove excess moisture.
Oven Method:
Preheat your oven to 175°F (80°C). Line two large baking sheets with parchment paper.
Arrange the orange slices in a single layer on the prepared baking sheets. They may touch slightly but should not overlap.
Bake for 3 to 4 hours, flipping the slices every hour to promote even drying. The slices are ready when they are completely dry and crisp to the touch.
Remove from the oven and allow them to cool completely before storing.
Dehydrator Method:
Preheat the dehydrator to 135°F (57°C).
Arrange the slices in a single layer on the dehydrator trays without overlapping.
Dry for 4 to 8 hours, flipping and checking periodically after the first 2 hours. Drying time will vary depending on slice thickness.
Once fully dried and crisp, remove and allow to cool before storing.
Servings and timing
Servings: 16 dried slices
Prep Time: 15 minutes
Drying Time: 4 hours
Total Time: 4 hours 15 minutes
Calories: Approximately 15 kcal per serving
Variations
Use different orange varieties such as blood oranges, Cara Cara oranges, or tangelos for color variation and visual interest.
Try mixing in other citrus fruits like lemons or limes for a multi-colored display.
For an edible treat, dip half of each dried slice in melted dark chocolate and allow it to set before serving.
Sprinkle lightly with cinnamon before drying for a subtle warm flavor.
Cut small shapes from partially dried slices using mini cookie cutters for decorative accents.
Storage/Reheating
Once completely cooled, store the dried orange slices in an airtight container at room temperature for up to 12 months.
Ensure the slices are fully dried before storing. Any remaining moisture can cause mold during storage.
Keep them in a cool, dry place away from humidity. If using for decorations like garlands, store the entire garland in a sealed container when not in use.
Reheating is not necessary. If slices soften due to humidity, you can place them back in a 175°F oven for 20 to 30 minutes to re-crisp.
FAQs
Does it matter what type of oranges I use?
Smaller oranges tend to dry more evenly and fit better on baking sheets. Different varieties will also produce slightly different colors.
Why are my oranges taking longer to dry?
Thicker slices require more drying time. High humidity in your kitchen can also extend the drying process.
How do I know when the slices are fully dried?
They should feel completely dry and crisp to the touch with no sticky or soft spots in the center.
Will the oranges shrink during drying?
Yes, they will shrink slightly as moisture evaporates, and the color will deepen.
Can I make these without parchment paper?
Parchment paper prevents sticking and promotes even drying. It is strongly recommended for oven use.
Can I stack the slices to save space?
No. Overlapping slices trap moisture and prevent proper drying.
Are dried orange slices edible?
Yes, they are fully edible and naturally sweet, though the peel may have a slightly bitter note.
Can I dry them at a higher temperature to speed up the process?
Higher temperatures may brown or burn the edges before the centers fully dry. Low and slow drying produces the best results.
Why did my dried oranges turn brown?
Slight browning is normal due to natural sugars caramelizing. Excessive browning may indicate the oven temperature was too high.
Can I use these for drinks?
Absolutely. They make beautiful garnishes for hot or cold beverages and add a subtle citrus aroma.
Conclusion
Dried Sliced Oranges are a timeless and versatile addition to your winter kitchen projects. With just one ingredient and minimal preparation, you can create decorations, garnishes, and edible treats that last for months. Whether displayed on a garland, tucked into gift wrap, or perched on a festive drink, these vibrant citrus slices bring natural elegance to any setting.
Simple oven- or dehydrator-dried orange slices that are naturally sweet, beautifully vibrant, and perfect for decorating, gifting, or garnishing drinks and desserts.
Total Time:4 hours 15 minutes
Yield:16 slices
Ingredients
4 medium oranges (about 2 to 2.5 pounds total)
Instructions
Wash and scrub the oranges thoroughly since the peel remains on.
Slice oranges evenly into 4–5 mm (1/8 to 3/16 inch) thick rounds using a mandoline or sharp knife.
Lay slices on paper towels and gently press with additional paper towels to remove excess moisture.
Oven Method: Preheat oven to 175°F (80°C) and line baking sheets with parchment paper.
Arrange slices in a single layer without overlapping.
Bake 3–4 hours, flipping every hour, until completely dry and crisp.
Allow to cool fully before storing.
Dehydrator Method: Preheat dehydrator to 135°F (57°C).
Arrange slices in a single layer on trays.
Dry 4–8 hours, flipping and checking periodically, until fully crisp.
Cool completely before storing.
Notes
Ensure slices are fully dry before storing to prevent mold.
Store in an airtight container up to 12 months.
Return to a 175°F oven for 20–30 minutes if slices soften.
Try blood oranges, lemons, or limes for color variation.


