Fall is never complete in my house without the sweet scent of spiced pumpkin filling the kitchen. This pumpkin pie in a cup recipe is my go-to when I want all the nostalgic flavor of classic pumpkin pie, but in a simpler, mess-free, individually portioned version. Whether I’m hosting a cozy get-together or just making dessert for the kids, this one never fails to impress—and yes, even my picky eater prefers this to Halloween candy.
Why You’ll Love This Recipe
I like to think of this as pumpkin pie’s more laid-back cousin—less fuss, all the flavor. Here’s why I keep coming back to it every year:
No slicing drama: I skip the messy pie slices and serve up neat little portions in ramekins—no stress, no crumbs.
Perfect portions: I get just enough indulgence without going overboard… though I usually sneak an extra one anyway.
Kid and party friendly: These are a hit at school events, Friendsgivings, and cozy family dinners.
That warm, spiced filling: With cinnamon, nutmeg, and ginger, each bite wraps me up in fall coziness.
Endless versatility: I’ve played with chocolate swirls, graham cracker crusts, and even pecan toppings—this recipe handles it all.
Ingredients
(Here’s a tip: Check out the full list of ingredients and measurements in the recipe card below.)
1 ⅓ cups all-purpose flour
½ teaspoon salt
½ cup cold butter or shortening
3 tablespoons cold water, or more as needed
2 cups mashed, cooked pie pumpkin (or 1 can of pure pumpkin puree, not pumpkin pie filling)
1 (12 fluid ounce) can evaporated milk
2 large eggs, beaten
¾ cup packed brown sugar
½ teaspoon ground cinnamon
½ teaspoon ground ginger
½ teaspoon ground nutmeg
½ teaspoon salt (again, yes!)
Directions
1. Preheat and prep: I preheat the oven to 400°F (200°C) and gather everything I need. No one likes to go hunting for spices mid-recipe.
2. Make the crust: I mix flour and salt in a large bowl, cut in the cold butter until it looks like coarse crumbs, and then add the cold water one tablespoon at a time. Once the dough holds together, I form it into a ball and let it rest for five minutes.
3. Roll and cut: I roll the dough out to about ⅛ inch thick and cut circles a bit larger than my ramekins. I press the crust gently into each cup and flute the edges if I’m feeling fancy.
4. Make the filling: In a separate bowl, I whisk the pumpkin, evaporated milk, brown sugar, eggs, and spices until smooth. I taste it (every time!) and tweak the spices to my liking.
5. Assemble and bake: I fill each cup about ¾ full with the pumpkin mixture and bake for 40–60 minutes. If the crust edges brown too quickly, I shield them with foil. They’re ready when a knife inserted near the edge comes out clean.
6. Cool and serve: I let the cups cool completely so the filling sets perfectly. Sometimes I top them with whipped cream—other times I just grab a spoon.
Servings and Timing
This recipe makes 8 individual servings, perfect for family-style sharing or easy entertaining.
Prep time: 30 minutes
Cook time: 60 minutes
Total time: 90 minutes
I use standard 6-ounce ramekins, but muffin tins or other oven-safe cups work too—just adjust baking time accordingly.
Variations
I love playing around with this base recipe. Here are a few of my favorite twists:
Graham cracker crust: I mix crushed graham crackers with melted butter and press them into the cups for a no-roll crust.
Chocolate swirl: I swirl in a spoonful of melted chocolate into the filling before baking—this one’s a kid magnet.
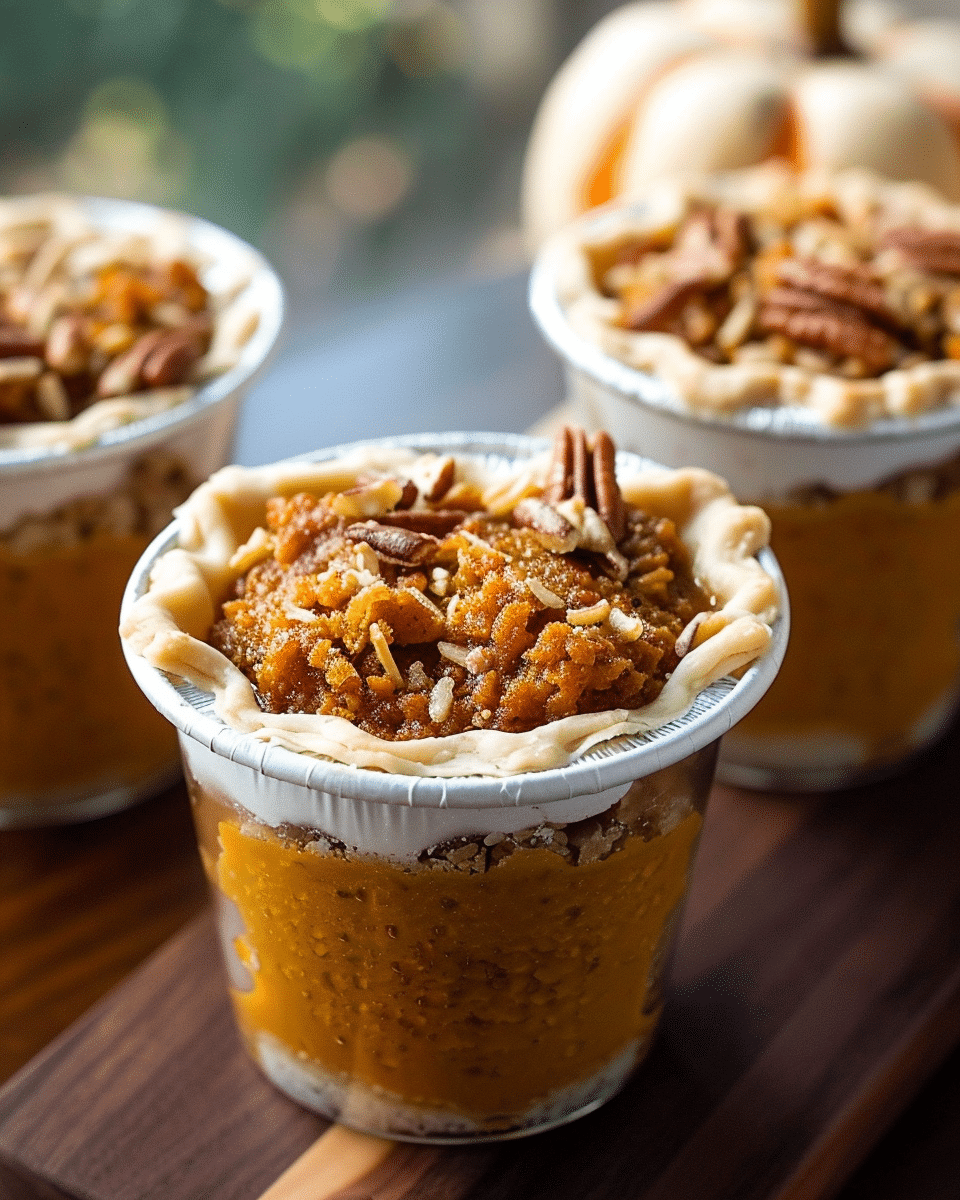
Nutty topping: I sprinkle chopped pecans mixed with brown sugar on top before baking for a caramelized crunch.
Mini muffin version: When I want bite-sized treats, I use a mini muffin tin and bake them for 20–25 minutes.
Whipped cream cloud: I always have whipped cream ready to dollop on top just before serving—sometimes with a cinnamon sprinkle.
Storage/Reheating
I rarely have leftovers, but when I do, here’s how I keep them delicious:
Refrigerator: I cover them tightly and store them in the fridge for up to 4 days. The crust softens a bit, but the flavor gets even better.
Microwave: I reheat one cup at a time for about 30 seconds. Whipped cream goes on after.
Oven: For crispier crusts, I warm them at 300°F for 10 minutes.
Freezing: I wrap the cooled pies in plastic wrap or foil and freeze them for up to 2 months. Thaw overnight in the fridge before reheating.
FAQs
Can I use canned pumpkin?
Yes, I often use 100% pure canned pumpkin when I’m short on time. Just avoid pumpkin pie filling—it has spices and sweeteners that throw off the balance.
How do I keep the filling from cracking?
I take them out of the oven when the edges are set but the center still jiggles slightly. Then I cool them slowly by cracking the oven door open for 10 minutes before moving them to the counter.
Can I freeze pumpkin pie in a cup?
Absolutely! I wrap each one tightly in plastic wrap or foil and freeze for up to two months. When I’m ready to serve, I thaw overnight and reheat as needed.
What if I don’t have ramekins?
No problem—I’ve used muffin tins, mason jars, and even coffee mugs. Just adjust the baking time based on the size of the container.
Can I make these ahead of time?
Definitely. I often bake them a day in advance, cool completely, and refrigerate. The flavors develop even more overnight, making them taste even better the next day.
Conclusion
This pumpkin pie in a cup recipe has become a fall tradition in my kitchen—easy to make, easier to serve, and always a hit with kids and adults alike. Whether I’m hosting a festive gathering or just chasing a craving, these little cups of creamy, spiced goodness never disappoint. I hope they become a favorite in your home too—happy baking!
Pumpkin Pie in a Cup is a cozy, mess-free twist on the classic dessert—perfectly portioned into ramekins for easy serving. With a flaky crust, creamy spiced pumpkin filling, and a dollop of whipped cream, this kid-friendly treat brings all the fall flavors with none of the fuss.
Total Time:90 minutes
Yield:8 servings
Ingredients
1 ⅓ cups all-purpose flour
½ teaspoon salt
½ cup cold butter or shortening
3 tablespoons cold water (more as needed)
2 cups mashed, cooked pie pumpkin or 1 (15 oz) can pure pumpkin puree
1 (12 oz) can evaporated milk
2 large eggs, beaten
¾ cup packed brown sugar
½ teaspoon ground cinnamon
½ teaspoon ground ginger
½ teaspoon ground nutmeg
½ teaspoon salt
Instructions
Preheat oven to 400°F (200°C) and prepare 8 ramekins or muffin cups.
In a bowl, mix flour and salt. Cut in cold butter until mixture resembles coarse crumbs. Add water one tablespoon at a time until dough comes together.
Roll dough to ⅛-inch thickness and cut circles slightly larger than ramekins. Press into each ramekin and shape edges if desired. Let rest while making filling.
In a separate bowl, whisk together pumpkin puree, evaporated milk, brown sugar, eggs, cinnamon, ginger, nutmeg, and salt until smooth.
Fill each crust-lined ramekin about ¾ full with pumpkin mixture.
Bake for 40–60 minutes, shielding crust edges with foil if they brown too quickly. Pies are done when a knife near the edge comes out clean.
Cool completely on a wire rack. Serve as-is or top with whipped cream and cinnamon.
Notes
Use canned pure pumpkin for ease, not pumpkin pie filling.
Swap the crust for a graham cracker base for quicker prep.
Add chocolate swirls, pecans, or festive toppings to customize.
Store in fridge for up to 4 days or freeze for up to 2 months.
Reheat in microwave for 30 seconds or in oven at 300°F for 10 minutes.


