I love how these Oreo Balls come together with almost no effort and deliver a rich, creamy bite every single time. This no-bake treat turns simple pantry staples into smooth, chocolate-coated truffles that feel special enough for holidays but easy enough for everyday cravings. I make them often for parties, gifts, or just when I want something sweet without turning on the oven.
Why You’ll Love This Recipe
I like this recipe because it only uses three basic ingredients and doesn’t require any baking at all. I can make it ahead of time, decorate it however I want, and count on it being a crowd-pleaser. I also enjoy how versatile it is, since I can change the chocolate coating or flavors depending on the season or occasion.
Ingredients
(Tip: You’ll find the full list of Ingredients and measurements in the recipe card below.)
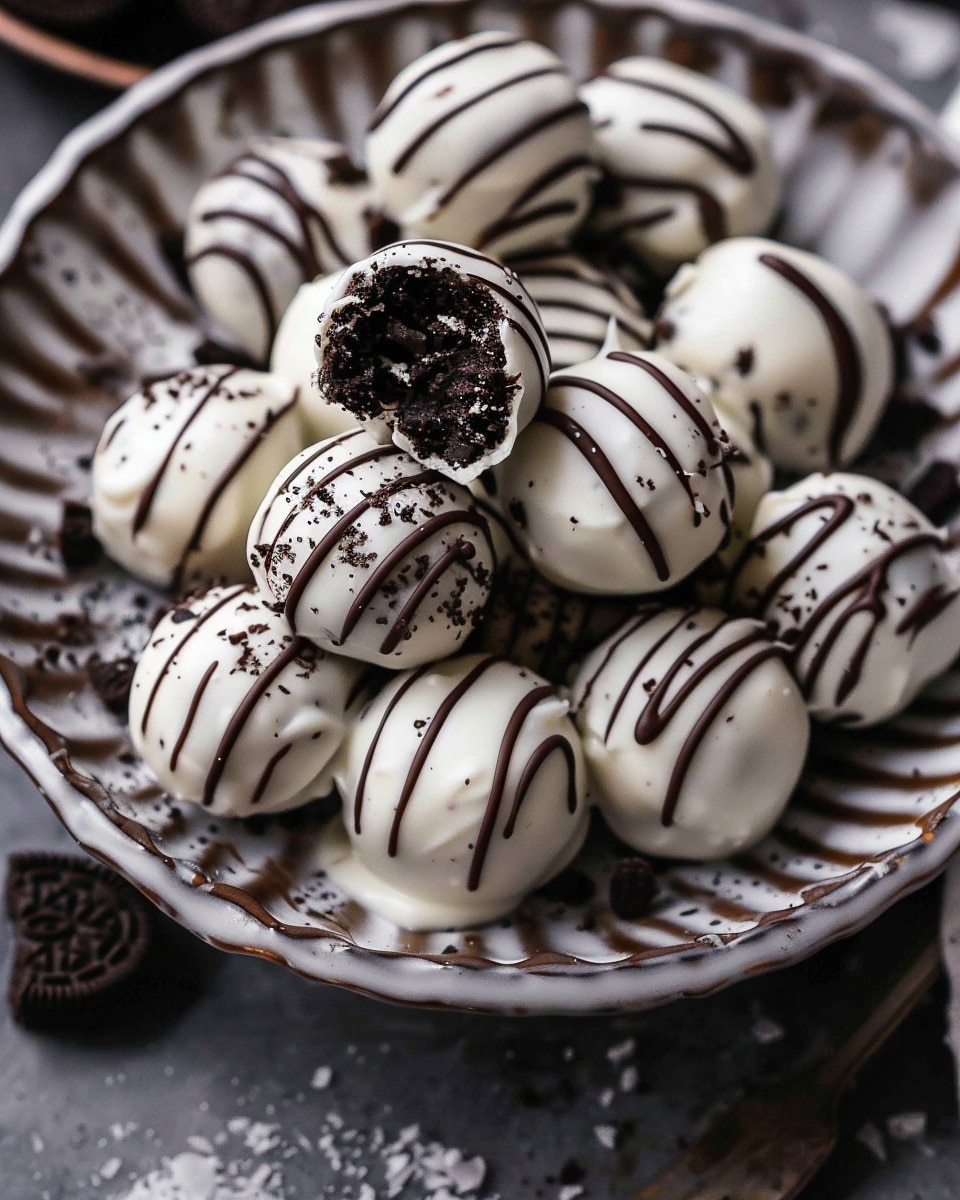
Oreo cookies
Cream cheese, softened
Chocolate melting wafers or melting chocolate
Optional decorations include extra melted chocolate, Oreo crumbs, sprinkles, crushed peppermint, or chopped nuts.
Directions
I start by crushing the Oreo cookies into very fine crumbs using a food processor, though I sometimes use a zip-top bag and rolling pin when I want to keep things simple. I mix the crumbs with softened cream cheese until the mixture is completely smooth and evenly combined.
Next, I scoop the mixture into small portions and roll them into bite-sized balls. I place them on a parchment-lined baking sheet and freeze them briefly so they firm up.
While the balls chill, I melt the chocolate according to the package instructions. I then dip each chilled Oreo ball into the melted chocolate, letting the excess drip off before placing it back on the lined sheet. Once all the balls are coated, I refrigerate them until the chocolate is fully set.
Servings And Timing
I usually get about 36 Oreo Balls from one batch. The prep time takes me around 25 minutes, followed by about 1 hour of chilling time. From start to finish, I plan for roughly 1 hour and 25 minutes.
Variations
I like switching things up by using different Oreo flavors such as mint, golden, or red velvet. Sometimes I add crushed peppermint for a festive twist or drizzle white chocolate over dark chocolate for contrast. I also enjoy making holiday-themed versions with colored candy melts or fun decorations to match the occasion.
Storage/Reheating
I store Oreo Balls in an airtight container in the refrigerator, where they stay fresh for up to three weeks. When I want to freeze them, I layer them with parchment paper in between and keep them frozen for up to two months. I always thaw them in the refrigerator before serving.
FAQs
Can I make Oreo Balls ahead of time?
I often make them several days in advance and keep them chilled until I’m ready to serve, which makes entertaining much easier.
Can I freeze Oreo Balls?
I freeze them regularly, and they hold their texture and flavor very well when thawed properly in the fridge.
What kind of chocolate works best?
I prefer melting wafers or almond bark because they melt smoothly and set nicely without tempering.
Can I use flavored Oreos?
I like experimenting with different Oreo flavors, and they all work great in this recipe.
Do Oreo Balls need to stay refrigerated?
I keep them refrigerated for best texture and food safety, especially if they sit out for more than a short time.
Conclusion
I keep coming back to this Oreo Balls recipe because it’s simple, reliable, and always a hit. With minimal ingredients and endless ways to customize, it’s one of those treats I never get tired of making or sharing.
Oreo Balls are an easy, no-bake dessert made with crushed Oreo cookies, cream cheese, and chocolate coating. These bite-sized treats are rich, creamy, and perfect for parties, holidays, or gifting.
Total Time:1 hour 25 minutes
Yield:36 balls
Ingredients
1 package Oreo cookies (36 cookies)
8 ounces cream cheese, softened
12 ounces chocolate melting wafers or melting chocolate


