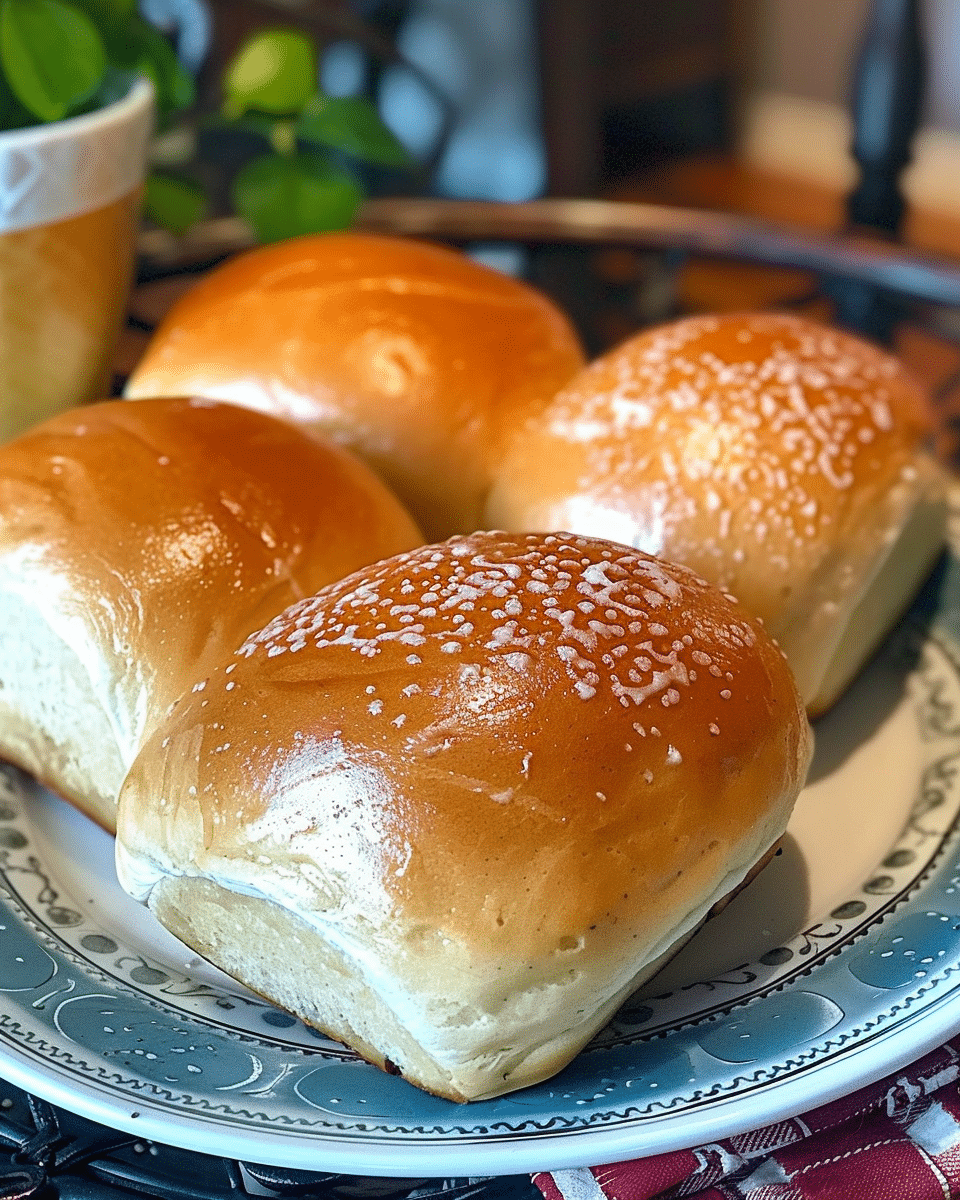
Learn how to make incredibly soft, buttery, golden-brown brioche buns at home with this surprisingly approachable recipe. These rich, fluffy buns are perfect for burgers, breakfast sandwiches, or simply enjoyed warm with a little jam and butter. I love how rewarding and cozy baking these feels — from the smell of yeast rising to the joy of pulling a golden bun from the oven.
Why You’ll Love This Recipe
Fast-ish: For a yeast bread, this moves along nicely. Most of the time is hands-off while the dough rises.
Easy to Follow: I don’t need to be a professional baker to succeed here. If I can mix and wait, I can make these.
Impressive Yet Practical: These buns look bakery-worthy but are made with everyday ingredients.
Perfect for Gifting or Sharing: I’ve wrapped them in parchment and handed them off to friends — instant joy!
Versatile: Whether I’m serving sweet fillings or savory sliders, these buns work beautifully.
Ingredients
(Here’s a tip: Check out the full list of ingredients and measurements in the recipe card below.)
½ cup whole milk, warmed slightly
1 tbsp active dry yeast
¼ cup granulated sugar
1 tsp salt
3 large eggs (for the dough)
3¾ cups all-purpose flour
½ cup unsalted butter (1 stick), cubed and softened
1 large egg (for egg wash)
1 tbsp milk (for egg wash)
Directions
Activate the Yeast I start by whisking the warm milk with the yeast and a pinch of sugar in a large bowl. I let it sit for 5–10 minutes until foamy, which tells me the yeast is alive and kicking.
Mix the Dough Once foamy, I add the rest of the sugar, salt, eggs, and about half the flour. I mix until mostly combined, then gradually add the rest of the flour until I have a shaggy, sticky dough.
Knead the Dough I knead by hand or use my stand mixer for 8–10 minutes until the dough becomes smooth and elastic. It’s okay if it’s a little tacky — that means the buns will be soft.
Incorporate the Butter I add the softened butter bit by bit while continuing to knead. The dough might break apart at first, but it comes together beautifully after 5–10 more minutes of kneading.
First Rise I transfer the dough to a greased bowl, cover it, and let it rise for 1–2 hours, or until doubled in size.
Shape the Buns I punch down the dough and divide it into 8–12 equal pieces. Then I shape each into a smooth ball and place them on a parchment-lined baking sheet.
Second Rise Covered loosely, I let the shaped buns rise again for 45–60 minutes until they’re puffy and nearly doubled.
Egg Wash I mix the egg and milk, then gently brush the tops of the buns for that rich, golden crust.
Bake I bake at 375°F (190°C) for 15–20 minutes until the buns are deep golden and sound hollow when tapped.
Cool I let them cool on a wire rack — or sneak one while it’s still warm, because how could I not?
Servings and timing
Servings: Makes 8 to 12 buns
Prep Time: 45 minutes
Rise Time: About 2½ to 3 hours
Bake Time: 15–20 minutes
Total Time: Around 4 hours
Variations
Sweeter Brioche: I sometimes add a bit more sugar and a dash of vanilla or citrus zest for a sweeter version.
Savory Herb Brioche: Fresh herbs like chives or thyme give a lovely twist when I’m planning to use these for sandwiches.
Chocolate Chip Brioche: Folding in chocolate chips after kneading the butter makes for an indulgent treat.
Dairy-Free Option: I’ve tried plant-based milk and margarine — it works, though the texture and flavor shift slightly.
Enriched Dough Upgrade: Adding a splash of heavy cream makes the dough even more luxurious.
Storage/Reheating
Room Temperature: I store cooled buns in an airtight bag or container for up to 3 days.
Fridge: These can go in the fridge for up to a week, though they dry faster.
Freezer: I freeze them after cooling, then reheat as needed. They keep well for 2–3 months.
To Reheat: I warm them in the oven at 300°F for 5–10 minutes or microwave briefly (wrapped in a damp paper towel) to bring back the softness.
FAQs
How do I know if my yeast is still good?
If the yeast doesn’t foam after sitting in warm milk for 10 minutes, it’s likely inactive. I always make sure the milk isn’t too hot — it should feel like bathwater.
Can I make these ahead of time?
Yes! I often shape the buns and refrigerate them overnight for the second rise. In the morning, I bring them to room temperature before baking.
Can I use instant yeast instead of active dry?
I can — I just skip the proofing step and mix it directly into the flour. But I still like proofing to be sure my yeast is working.
Why is my dough sticky?
That’s normal for brioche! I avoid adding too much flour. A slightly sticky dough creates a soft, tender crumb. A bench scraper helps me manage the stickiness.
Can I make mini brioche buns?
Absolutely. I divide the dough into more pieces (about 12–14) for slider-sized buns. I just reduce the bake time by a few minutes and keep an eye on them.
Conclusion
Baking brioche buns at home is one of those kitchen wins that feels both impressive and deeply comforting. I love how soft and rich they turn out every time — and how adaptable they are for every meal or craving. Once I started making them from scratch, I never looked back. So go ahead, roll up those sleeves, and let the smell of fresh, buttery bread fill your kitchen.
These soft, buttery brioche buns are rich, fluffy, and golden-brown—perfect for burgers, sandwiches, or enjoying warm with jam. Made from scratch with simple ingredients, they’re easier than they look and deeply satisfying to bake.
Total Time:4 hours (includes rise time)
Yield:8 to 12 buns
Ingredients
½ cup whole milk, warmed
1 tbsp active dry yeast
¼ cup granulated sugar
1 tsp salt
3 large eggs (for dough)
3¾ cups all-purpose flour
½ cup unsalted butter (1 stick), cubed and softened
1 large egg (for egg wash)
1 tbsp milk (for egg wash)
Instructions
Whisk warm milk, yeast, and a pinch of sugar in a large bowl. Let sit for 5–10 minutes until foamy.
Add remaining sugar, salt, eggs, and half of the flour. Mix until combined. Gradually add remaining flour to form a shaggy dough.
Knead dough by hand or mixer for 8–10 minutes until smooth and elastic.
Add softened butter bit by bit, kneading until fully incorporated and dough is glossy and tacky (about 5–10 more minutes).
Transfer dough to a greased bowl. Cover and let rise for 1–2 hours until doubled in size.
Punch down dough and divide into 8–12 equal pieces. Shape into balls and place on a parchment-lined baking sheet.
Cover loosely and let rise for 45–60 minutes until puffy.
Mix egg and milk for the egg wash and gently brush onto risen buns.
Bake at 375°F (190°C) for 15–20 minutes until golden brown and hollow-sounding when tapped.
Cool on a wire rack before serving.
Notes
Add vanilla or citrus zest for a sweeter variation.
Mix in herbs like chives or thyme for savory buns.
Fold in chocolate chips after butter kneading for a dessert version.
Substitute plant-based milk and margarine for a dairy-free option.
Refrigerate shaped buns overnight and bake fresh the next day.


